How to Create a Timer on Scratch: A Step-by-Step Breakdown
Timers are the unsung heroes of interactive projects—whether you're building a game with countdowns, a productivity tool for young coders, or an educational simulation. Scratch, MIT’s block-based programming environment, turns this seemingly simple task into a gateway for teaching logic, loops, and event-driven programming. The process isn’t just about setting a clock; it’s about understanding how variables, broadcasts, and conditional blocks orchestrate time itself. For educators, parents, or developers refining their Scratch skills, mastering how to create a timer on Scratch is a foundational step toward more dynamic projects.
Yet, despite its intuitive drag-and-drop interface, many users stumble when translating real-world timing needs into Scratch’s syntax. The confusion often lies in bridging the gap between abstract blocks (like "wait until") and tangible outcomes (a visual countdown or a triggered event). Without a clear roadmap, even seasoned coders might overlook critical optimizations—such as using "forever" loops for continuous updates or "broadcast" messages to sync timers across sprites. The result? A timer that either freezes, fails to reset, or lacks polish. This guide dismantles those pitfalls, offering a structured approach to building timers that are both functional and scalable.
What separates a basic timer from one that feels responsive and immersive? The answer lies in the details: precise variable initialization, conditional checks for edge cases (like negative time), and aesthetic touches like sprite animations or sound effects. Scratch’s timer projects can range from a simple 10-second countdown to a multi-stage puzzle where each phase unlocks new mechanics. The key is treating the timer as a modular component—one that can be reused, adjusted, and integrated into larger systems. Whether you’re designing a quiz game, a stopwatch, or a time-sensitive challenge, the principles remain the same: clarity in logic, efficiency in execution, and creativity in presentation.

The Complete Overview of How to Create a Timer on Scratch
At its core, creating a timer in Scratch revolves around three pillars: tracking time, updating a display, and triggering actions at specific intervals. The platform’s block-based system abstracts the complexity of manual timekeeping, but the underlying mechanics—variables, loops, and event handling—demand intentional design. A well-constructed timer begins with a variable to store elapsed time, often paired with a broadcast to signal when the countdown completes. For example, a game might use a timer to restrict player moves, while an educational tool could enforce time limits on quiz questions. The beauty of Scratch lies in its adaptability; the same timer logic can serve vastly different purposes with minor adjustments.
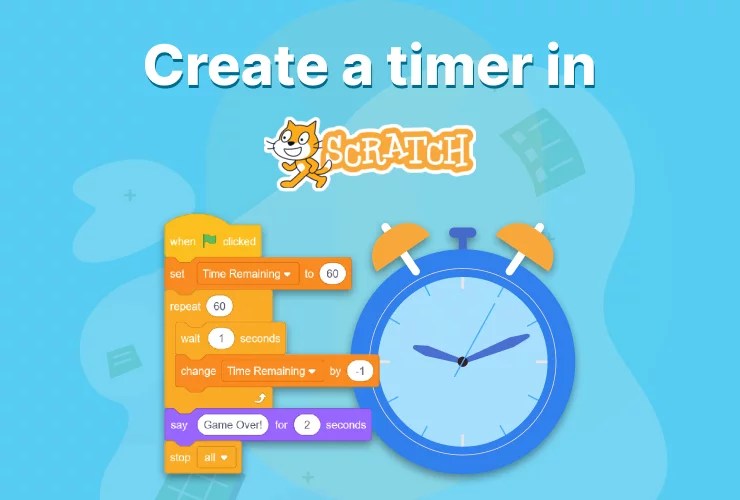
However, the devil is in the details. A timer that simply waits for a fixed duration ("wait 10 seconds") is static and lacks interactivity. To make it dynamic, you’ll need to continuously decrement a variable (e.g., "change [time] by -1") within a loop, then check if the variable reaches zero to trigger the next step. This approach not only creates a smooth countdown but also allows for real-time adjustments—such as pausing the timer or resetting it mid-execution. Advanced users might even incorporate user inputs (via the "ask" block) to customize timer durations, adding layers of engagement. The challenge, then, is balancing simplicity with functionality, ensuring the timer serves its purpose without overwhelming the project’s scope.
Historical Background and Evolution
The concept of timers in programming predates Scratch by decades, evolving from low-level assembly instructions to high-level abstractions. Early educational tools like Logo introduced kids to loops and delays, but Scratch’s 2007 debut democratized interactive media creation by simplifying these concepts into color-coded blocks. Timers, in particular, became a staple for teaching how to create timer on Scratch because they encapsulate fundamental programming patterns: initialization, iteration, and termination. Over time, Scratch’s community expanded the possibilities, with users sharing projects that used timers for everything from musical rhythms to physics simulations. The platform’s iterative updates—such as the introduction of broadcast messages—further refined how timers could communicate between sprites, enabling more complex systems.
Table of Contents
- The Complete Overview of How to Create a Timer on Scratch
- Historical Background and Evolution
- Core Mechanisms: How It Works
- Key Benefits and Crucial Impact
- Major Advantages
- Comparative Analysis
- Future Trends and Innovations
- Conclusion
- Comprehensive FAQs
- Q: Can I create a timer that counts up instead of down?
- Q: How do I reset a timer in Scratch?
- Q: Why does my Scratch timer freeze or stop working?
- Q: Can I sync multiple timers across different sprites?
- Q: How can I make my timer more visually engaging?
- Q: Is there a way to pause and resume a Scratch timer?
Today, Scratch’s timer implementations reflect broader trends in educational technology, where gamification and interactive storytelling rely on precise time management. For instance, a 2018 study on Scratch’s use in STEM education highlighted how timers in coding challenges improved problem-solving skills by introducing constraints. Meanwhile, Scratch’s shift toward remix culture—where users build upon existing projects—has led to specialized timer templates, from stopwatches to race-game countdowns. The evolution of Scratch timers mirrors the platform’s growth: from a tool for basic logic to a canvas for creative experimentation, where every second counts.
Core Mechanisms: How It Works
The mechanics of a Scratch timer hinge on two interconnected systems: variable management and event-driven execution. Variables act as the timer’s memory, storing values that change over time. For a countdown, you’d initialize a variable (e.g., "set [time] to 10") and then use a loop to decrement it ("change [time] by -1"). The loop runs continuously, but the timer’s "tick" rate is controlled by the "wait" block—typically set to 1 second for smooth updates. Meanwhile, event-driven execution ensures the timer responds to user actions or other triggers. For example, clicking a sprite might start the timer, while a broadcast message could pause it. This dual system allows timers to be both autonomous and interactive, adapting to the project’s needs.
Under the hood, Scratch’s timer logic relies on asynchronous updates. Unlike a traditional programming loop that runs in sequence, Scratch’s blocks execute in a way that prioritizes responsiveness. When you place a "forever" loop with a "wait" block inside, the script doesn’t freeze the entire project—it yields control to other scripts, creating a non-blocking timer. This is why a Scratch timer can coexist with animations or sound effects without lag. Advanced users leverage this by nesting conditional checks (e.g., "if [time] < 0 then broadcast [timer done]") to handle edge cases, such as preventing negative time values or resetting the timer after completion. The result is a system that feels intuitive to users while masking the complexity beneath.
Key Benefits and Crucial Impact
A well-designed timer in Scratch isn’t just a functional tool—it’s a pedagogical powerhouse. For learners, it bridges abstract concepts like loops and variables with tangible outcomes, such as a countdown that triggers a game over. For educators, it provides a scaffold for teaching time-based logic without the intimidation factor of syntax-heavy languages. Beyond education, Scratch timers enable developers to prototype interactive stories, games, or simulations where time plays a critical role. The impact extends to accessibility: timers can be customized for users with different needs, such as longer durations for readability or visual cues for those who rely on non-auditory feedback.
In professional contexts, Scratch timers serve as a gateway to understanding real-world systems, from traffic light simulations to sports event timers. The platform’s emphasis on how to create timer on Scratch with minimal code fosters creativity, allowing users to focus on design rather than debugging. For instance, a timer in a Scratch-based escape room game might control puzzle availability, while in a music project, it could dictate beat intervals. The versatility of Scratch timers lies in their ability to adapt to diverse use cases, all while reinforcing core programming principles.
"A timer in Scratch is more than a countdown—it’s a narrative device, a constraint, and a teacher, all in one."
—MIT Scratch Team, 2020 Educational Workshop
Major Advantages
- Instant Feedback: Visual and auditory updates (e.g., changing colors or playing sounds) reinforce learning by providing immediate responses to timer events.
- Reusability: Timer scripts can be duplicated across projects, saving time and ensuring consistency in behavior.
- Collaborative Potential: Broadcast messages allow timers to synchronize across multiple sprites, enabling complex interactions like team-based challenges.
- Accessibility Customization: Variables can be adjusted for different user needs, such as slower countdowns for readability or larger fonts for visibility.
- Cross-Disciplinary Applications: Timers can model real-world systems (e.g., chemical reactions, sports timers) without requiring advanced math or physics knowledge.
Comparative Analysis
| Feature | Scratch Timer | Traditional Coding Timer |
|---|---|---|
| Ease of Implementation | Drag-and-drop blocks; minimal syntax errors. | Requires manual setup of loops, variables, and event listeners. |
| Visual Feedback | Built-in sprite animations, color changes, and sound effects. | Requires additional UI code (e.g., HTML/CSS for web timers). |
| Scalability | Limited by Scratch’s block structure; complex timers may need workarounds. | Highly scalable with libraries (e.g., JavaScript’s setInterval). |
| Educational Value | Teaches logic, loops, and events in an engaging format. | Focuses on syntax and algorithmic efficiency. |
Future Trends and Innovations
The future of Scratch timers is likely to be shaped by two forces: expanded interactivity and cross-platform integration. As Scratch continues to evolve, we can expect timers to incorporate more sophisticated inputs, such as voice commands or sensor data (via extensions like Scratch Link). Imagine a timer triggered by a physical button or adjusted based on a user’s heart rate—these innovations would blur the line between digital and physical programming. Additionally, Scratch’s growing ecosystem of remixable projects may lead to community-driven timer libraries, where users share pre-built scripts for specific use cases (e.g., a "race timer" or "study session tracker").
On a broader scale, Scratch timers could serve as a bridge to more advanced tools. For example, a user comfortable with how to create timer on Scratch might transition to Python or JavaScript, where they can build upon the same logic with greater control. Collaborations between Scratch and platforms like Arduino could also introduce hardware-based timers, where physical components (like LEDs or motors) respond to Scratch-generated time signals. As AI-assisted coding tools emerge, Scratch’s timer blocks might even be auto-generated based on natural language descriptions, further lowering the barrier to entry. The key trend? Timers will become more context-aware, adapting not just to code but to the user’s intent.

Conclusion
Creating a timer on Scratch is more than a technical exercise—it’s a window into the broader principles of programming. By mastering variables, loops, and events, users gain the tools to build interactive systems that respond to time in meaningful ways. The beauty of Scratch lies in its ability to make these concepts accessible without sacrificing depth. Whether you’re designing a game, an educational tool, or a creative experiment, the timer remains a versatile component, limited only by imagination. The next time you set out to create a timer on Scratch, remember: you’re not just coding a countdown; you’re crafting an experience.
The journey from a static "wait" block to a dynamic, user-responsive timer is a testament to Scratch’s power. As the platform grows, so too will the possibilities for timers—expanding from simple countdowns to complex, multi-layered systems. For now, the core principles remain unchanged: clarity in logic, precision in execution, and creativity in application. Start with a single block, refine the details, and let the timer become the heartbeat of your project.
Comprehensive FAQs
Q: Can I create a timer that counts up instead of down?
A: Yes. Initialize a variable (e.g., "set [time] to 0") and use a loop with "change [time] by 1" in a "forever" block. Add a "wait 1 second" block inside the loop to control the tick rate. For a stopwatch effect, you’ll also need to handle overflow (e.g., converting seconds to minutes) using conditional blocks.
Q: How do I reset a timer in Scratch?
A: Use a broadcast message or a green flag click to trigger a script that sets the timer variable back to its initial value (e.g., "set [time] to 10"). You can also add a button sprite that, when clicked, resets the timer. For example:
when this sprite clicked
Then, in the timer sprite’s script, include:
broadcast [reset timer]
when I receive [reset timer]

set [time] to 10
Q: Why does my Scratch timer freeze or stop working?
A: Common causes include:
- Missing "forever" loop: Without a loop, the timer runs only once.
- Incorrect variable scope: Ensure the timer variable is shared (not just for one sprite).
- Blocking scripts: Avoid placing "wait" blocks outside loops, as they can halt other scripts.
- Negative time values: Add a check like "if [time] < 0 then stop [this script]" to prevent errors.
Q: Can I sync multiple timers across different sprites?
A: Absolutely. Use broadcast messages to communicate between sprites. For example:
- Sprite A (the timer) broadcasts "[time update]" every second, sending the current time as a variable.
- Sprite B (the display) listens for "[time update]" and updates its own variable or text.
when green flag clicked

forever

  change [time] by -1

  broadcast [time update] with [time]

end
Q: How can I make my timer more visually engaging?
A: Enhance the timer with:
- Sprite animations: Use "next costume" to cycle through visual states (e.g., a countdown bar that shrinks).
- Sound effects: Add "play sound [tick]" inside the loop for auditory feedback.
- Dynamic text: Use the "say" or "think" blocks to display the remaining time.
- Color changes: Adjust the sprite’s color based on the timer value (e.g., red when near zero).
- Particles or effects: Use the "pen" block to draw a visual countdown or add a "glow" effect.
Q: Is there a way to pause and resume a Scratch timer?
A: Yes. Use two broadcast messages:
- "pause timer": Store the current time in a separate variable (e.g., "set [paused time] to [time]") and stop the loop.
- "resume timer": Restore the paused time ("set [time] to [paused time]") and restart the loop.
when I receive [pause timer]

set [paused time] to [time]

stop [this script]when I receive [resume timer]

set [time] to [paused time]

forever

  change [time] by -1

  wait 1 second

end
Add buttons or key presses to trigger these broadcasts.
Leave a Comment
Comments are moderated before appearing. The data you submit is processed according to the Privacy Policy of Viralcontentbee.